1
Create a bootable Lenovo Golden U1 tool on a USB pen drive. Bootable Lenovo Golden U1 tool create karein (USB pen drive par).
Prepare 8GB+ FAT32 USB formatted with Lenovo Golden U1 UtilitiesPlease sign in with Google to report technical issues, view administrator replies, and manage your tickets.
Sign in with GoogleA complete 30-step walkthrough for unlocking forgotten supervisor passwords (SVP) on ThinkPad MEC15xx, NPCxx, ITExx, and MEC17xx series laptops. Follow each phase using the Lenovo Golden Key U1 tool paired with our automated IAS VIP Tools online patcher and 16-digit code generator. ThinkPad MEC15xx, NPCxx, ITExx aur MEC17xx series ke locked supervisor password (SVP) ko unlock karne ka poora 30-step detailed guide. Lenovo Golden Key U1 tool aur IAS VIP Tools ke automated patcher aur 16-digit code generator ke sath screen match karke step-by-step follow karein.
Create the Golden U1 pen drive and write the patched BIOS image. Golden U1 pen drive banayein aur patched BIOS image flash karein.
Create a bootable Lenovo Golden U1 tool on a USB pen drive. Bootable Lenovo Golden U1 tool create karein (USB pen drive par).
Prepare 8GB+ FAT32 USB formatted with Lenovo Golden U1 UtilitiesPatch your main BIOS using the unlocked section under IAS VIP Tools → MEC17xx / NPCxx / ITExx / MEC15xx. Apne main BIOS ko IAS VIP Tools → MEC17xx / NPCxx / ITExx / MEC15xx ke unlocked section se patch karein.
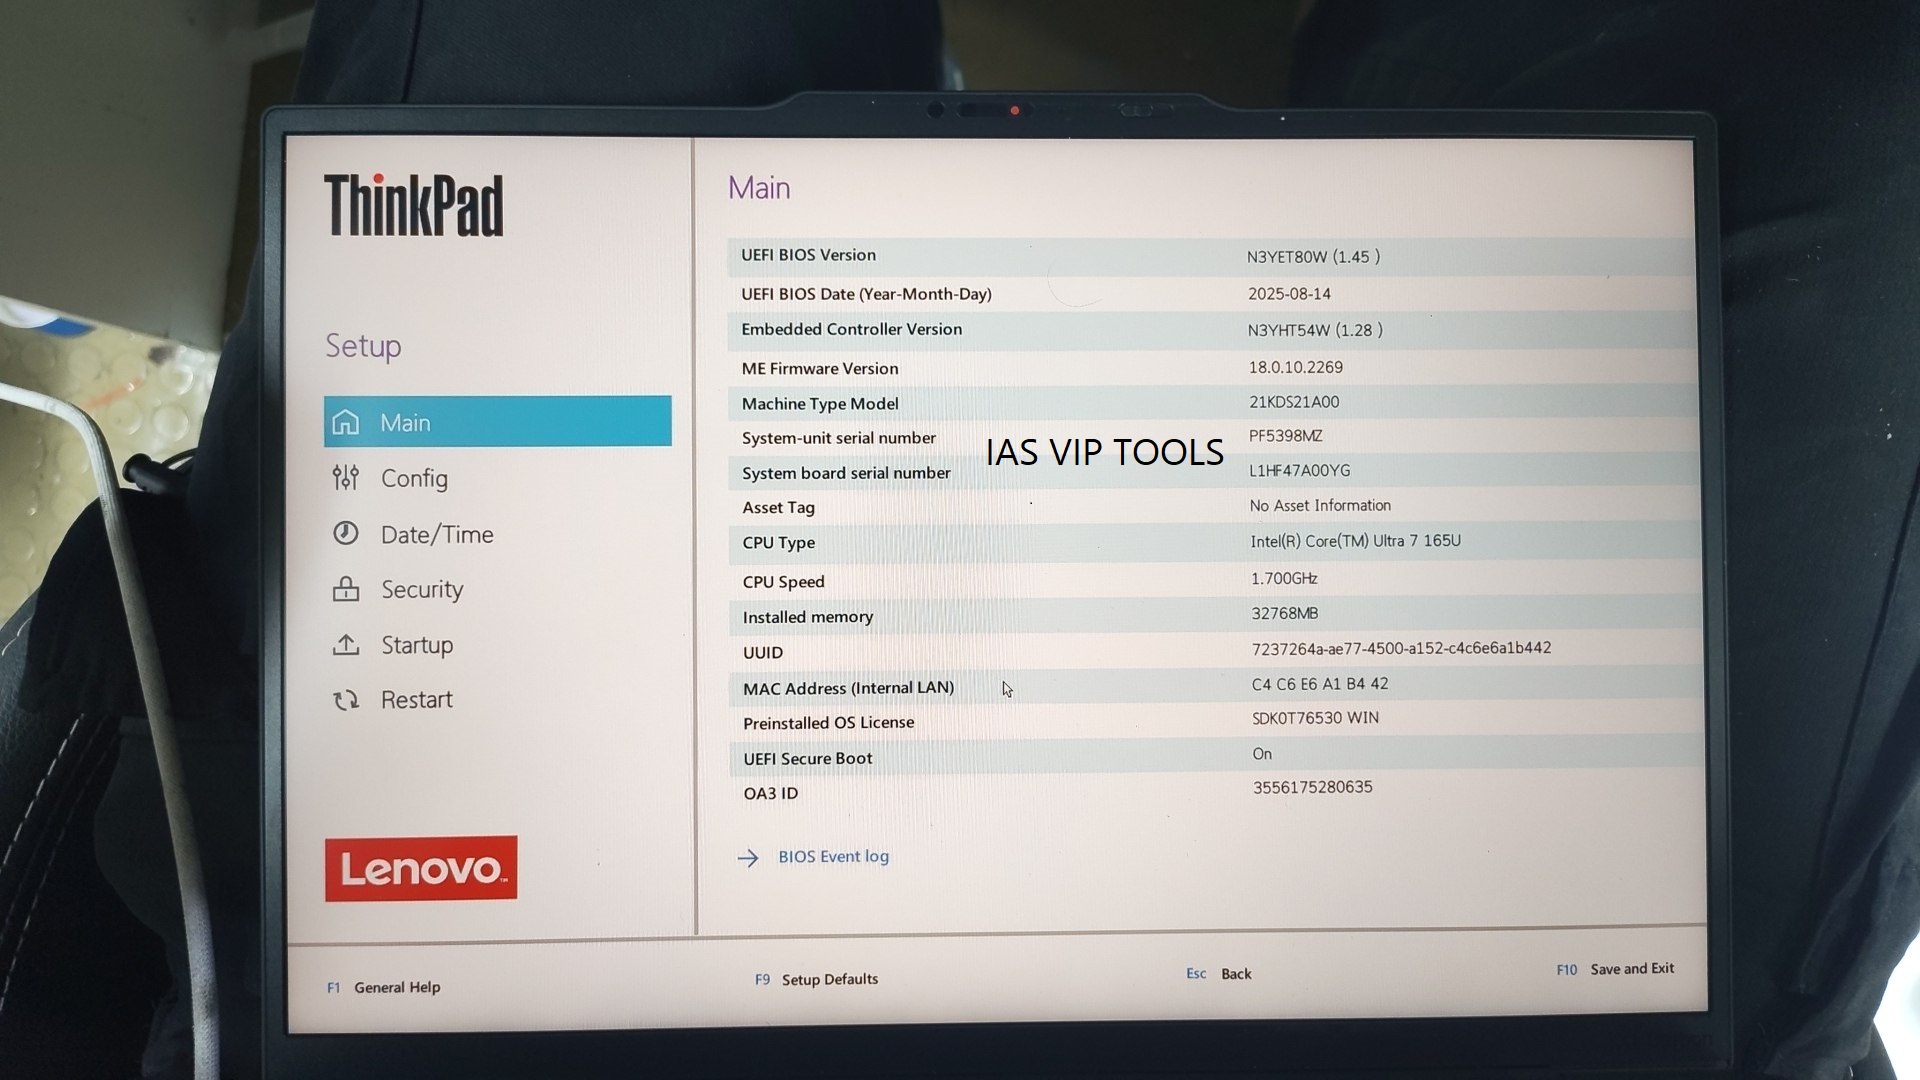
Reference: Main BIOS information screen (UEFI version, model 21KDS21A00).
Flash the patched main BIOS onto the device using your hardware programmer (CH341A / RT809F / SVOD / EZP). Patched main BIOS ko hardware programmer (CH341A / RT809F / SVOD / EZP) se device par flash karein.
First boot with U1 drive, read QR challenge, and inject master unlock key. U1 drive ke sath pehla boot, QR challenge scan aur unlock code enter karein.
Connect the U1 bootable pen drive to a USB port on the motherboard. U1 bootable pen drive ko motherboard ke USB port me connect karein.
Remember which physical port you plug it into!Power on the laptop with battery or genuine AC adapter. Laptop ko power on karein (charger / battery laga kar).
Press F1 continuously to continue through the BIOS prompt. Boot ke time lagatar F1 dabakar Continue karein.
A QR code challenge screen will now appear on your laptop display. Ab screen par QR code challenge screen dikhegi.
Scan the QR code using your phone/Android app, or save the text challenge file to the USB drive. QR ko mobile / Android app se scan karein ya text file USB me save karein.
Upload the text file or QR photo to the Generate Code tab in IAS VIP Tools to calculate your 16-digit unlock code. Text file ya QR photo ko IAS VIP Tools → Generate Code tab me upload karke 16-digit unlock code prapt karein.
Reconnect the USB drive to the exact same port as before — DO NOT CHANGE THE PORT. USB pen drive ko usi same port me dobara connect karein — PORT KABHI CHANGE NA KAREIN.
Critical: USB port index is cryptographically hashed into the challenge string!Enter the generated 16-digit password code, press OK, then press F1 to continue. DO NOT PRESS SKIP BUTTON! Generated 16-digit password code enter karein, OK dabayein, phir F1 dabakar Continue karein. SKIP BUTTON KABHI NA DABAYEIN!
Crucial settings required for the Golden U1 pen drive to execute initialization. U1 pen drive se initialization boot karne ke liye zaroori BIOS settings.
Enter BIOS Setup, open the Security tab, and locate the Secure Boot option on the right. BIOS Setup me jaayein → Security tab → right side Secure Boot option dhundein.
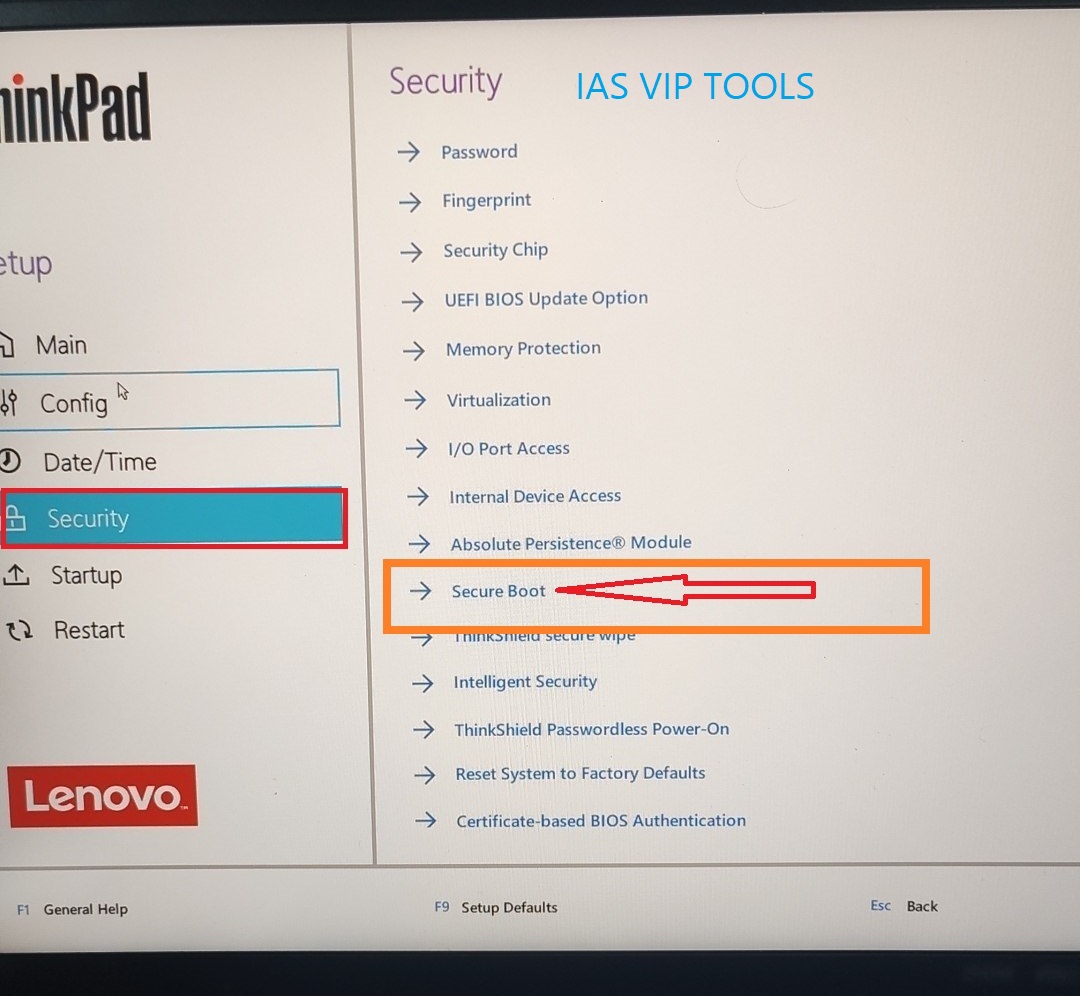
Reference: Security tab — Secure Boot listed among the options.
Turn Secure Boot OFF (disable it). Make sure Secure Boot is completely OFF. Secure Boot ko OFF / Disable karein. Make sure Secure Boot ON na ho.
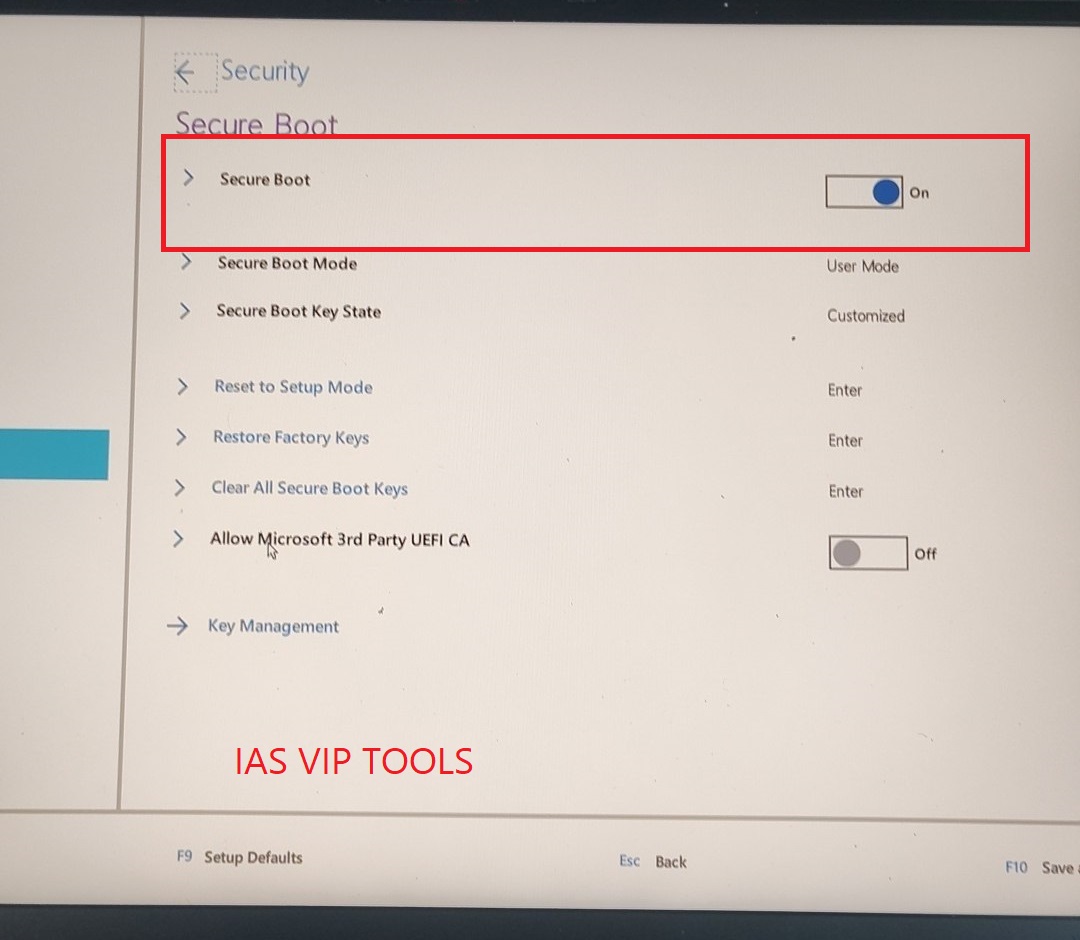
Before: Secure Boot = On
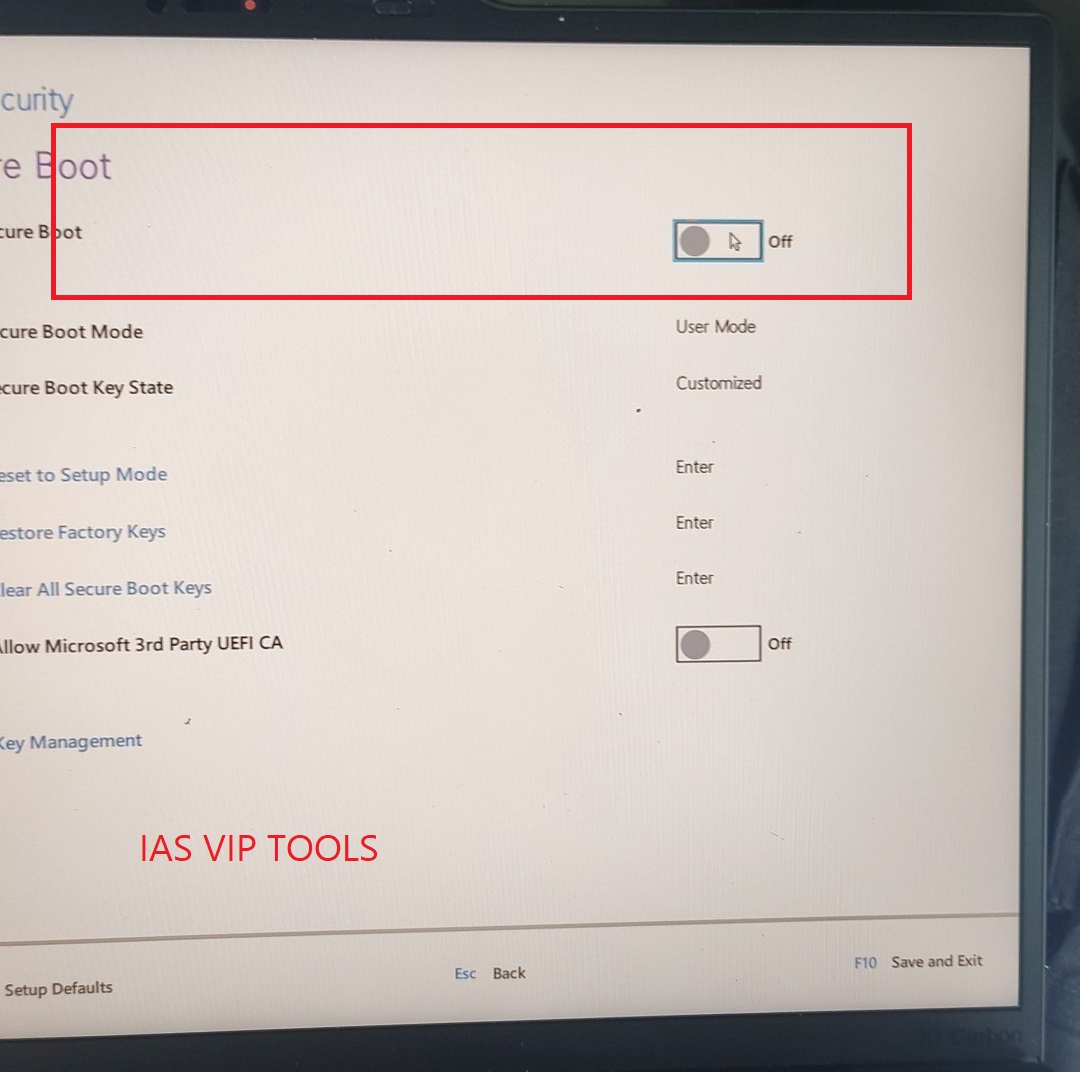
After: Secure Boot = Off ✔ (CORRECT)
Open the Config menu on the left side, then find the USB option on the right. Left side Config menu par click karein, aur right side USB option dekhein.
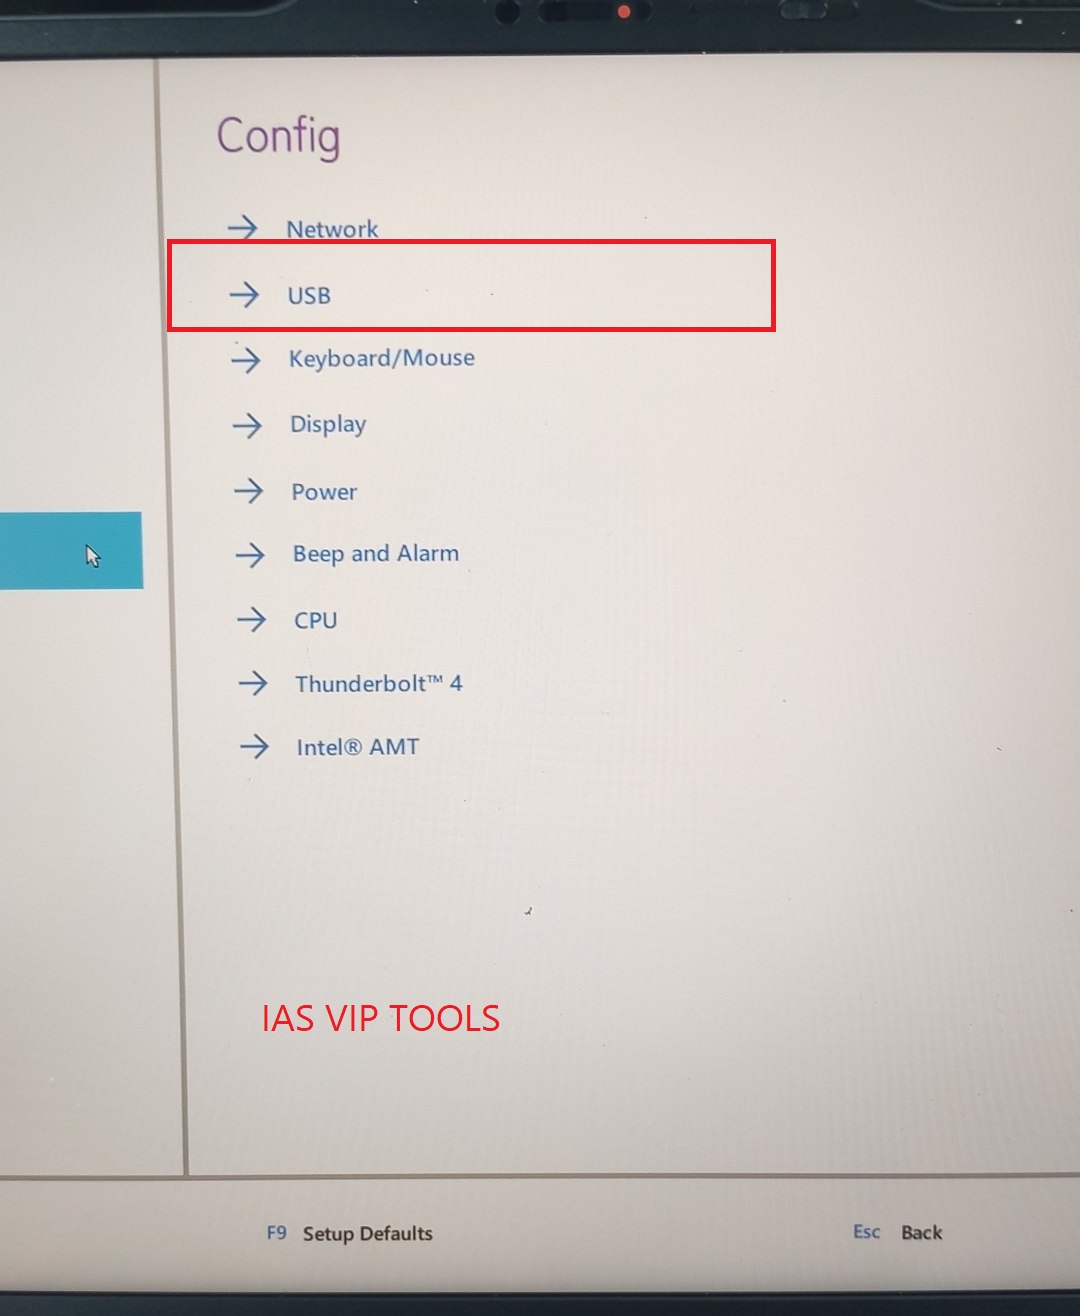
Reference: Config menu — USB option.
Set Always On USB to ON (keeps continuous 5V USB power active). Always On USB ko ON set karein (USB power hamesha ON rakhein).
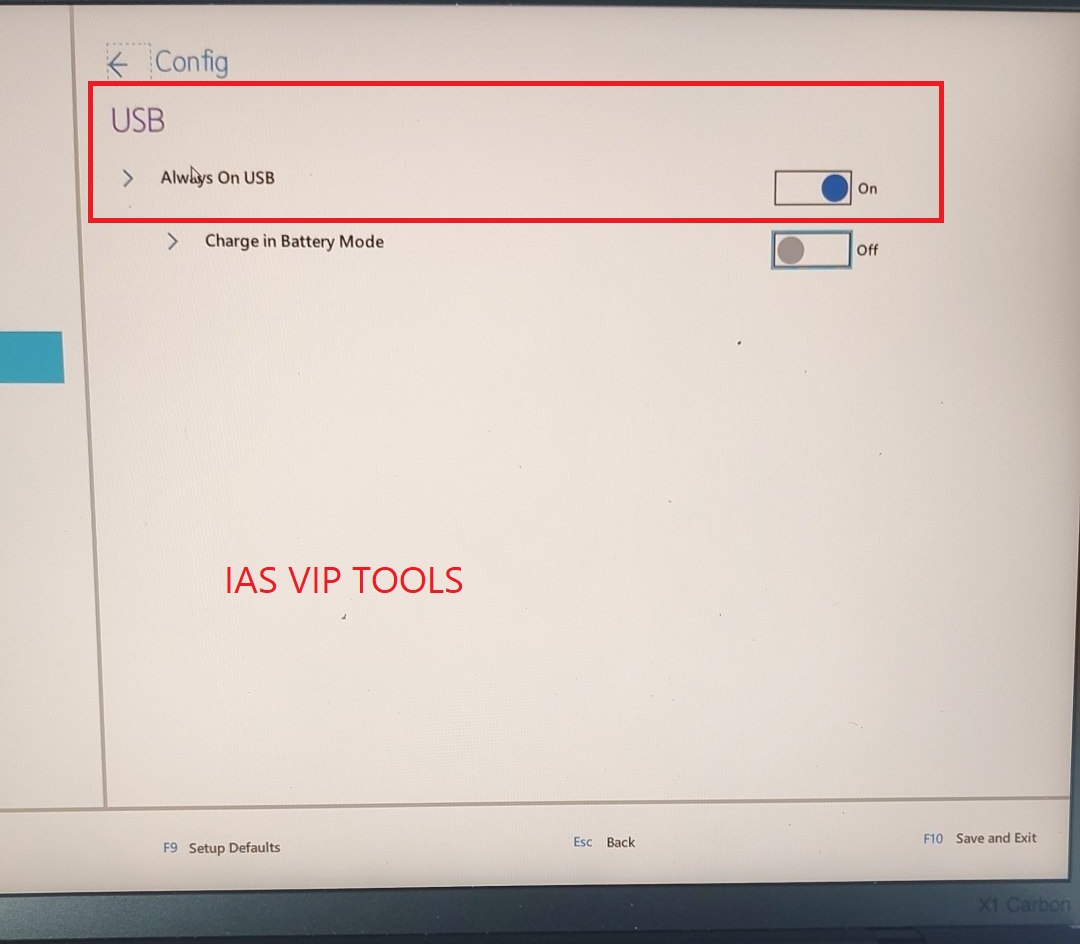
Reference: Always On USB = On ✔ (CORRECT)
Open the Startup menu on the left side, then open Boot mode / Boot order on the right. Left side Startup option par click karein → right side Boot mode / Boot order dekhein.
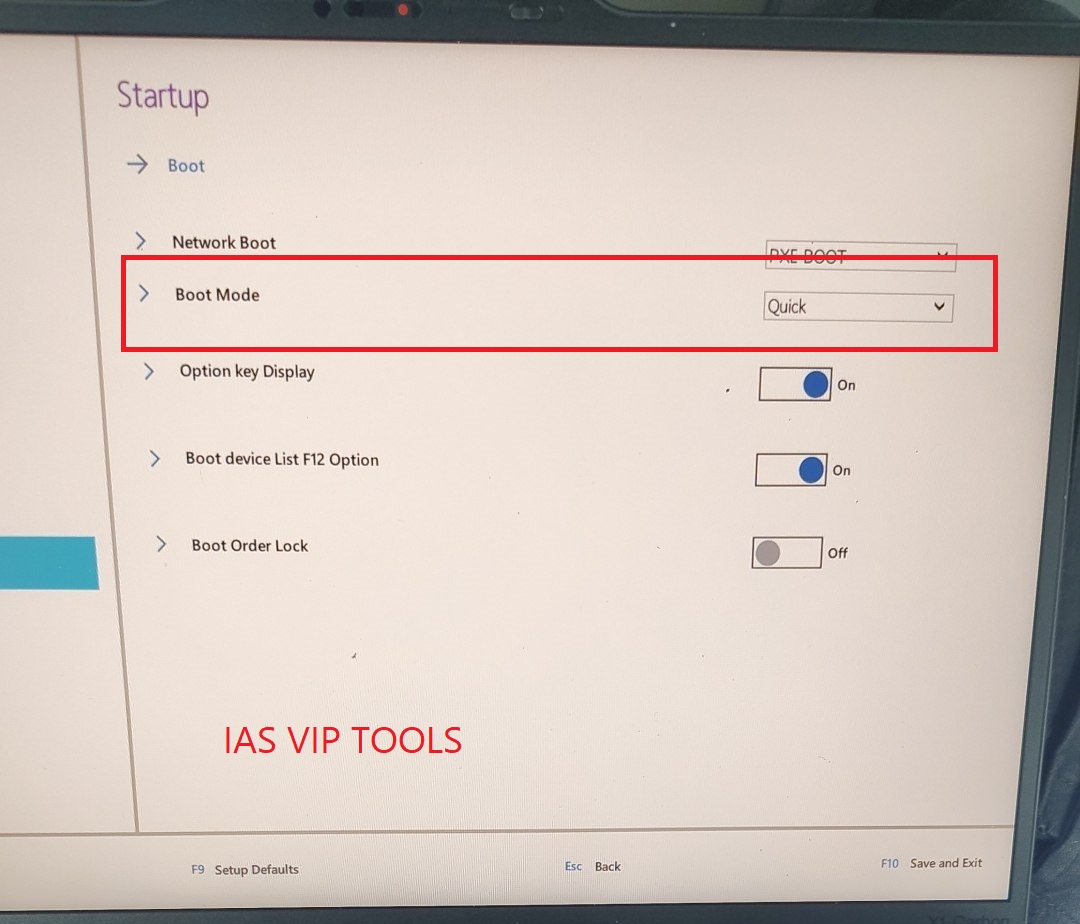
Reference: Startup → Boot settings (make sure Boot Order Lock = Off).
Edit the Boot Priority Order and move USB HDD to the very TOP (Position 1). Boot Priority Order ko edit karein aur USB HDD ko sabse TOP (Position 1) par le jaayein.
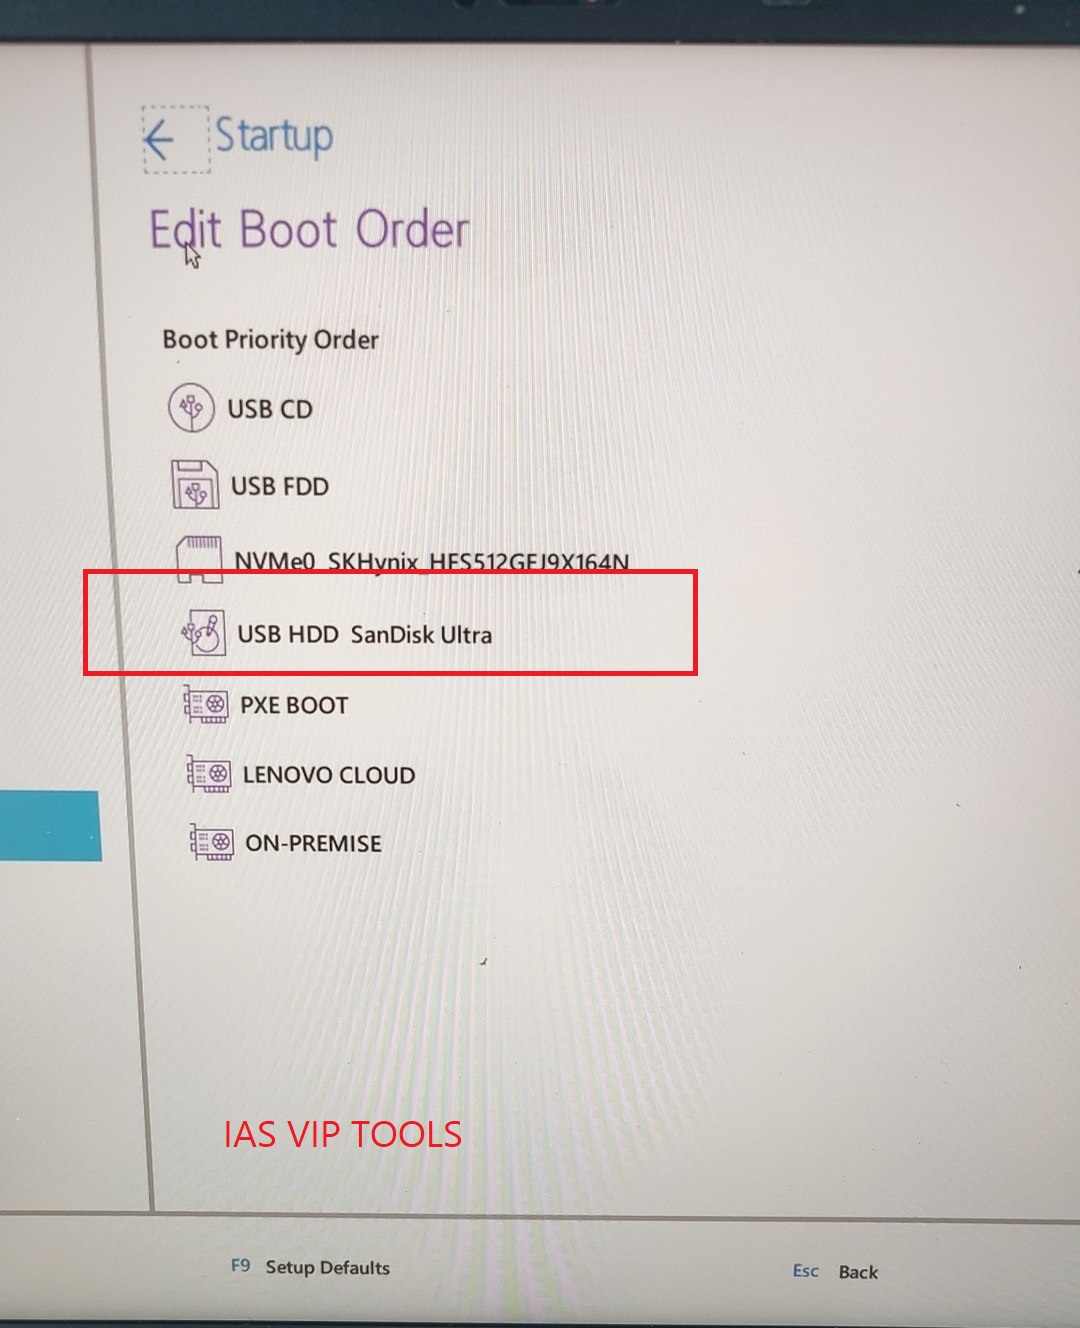
Before: USB HDD lower in the list
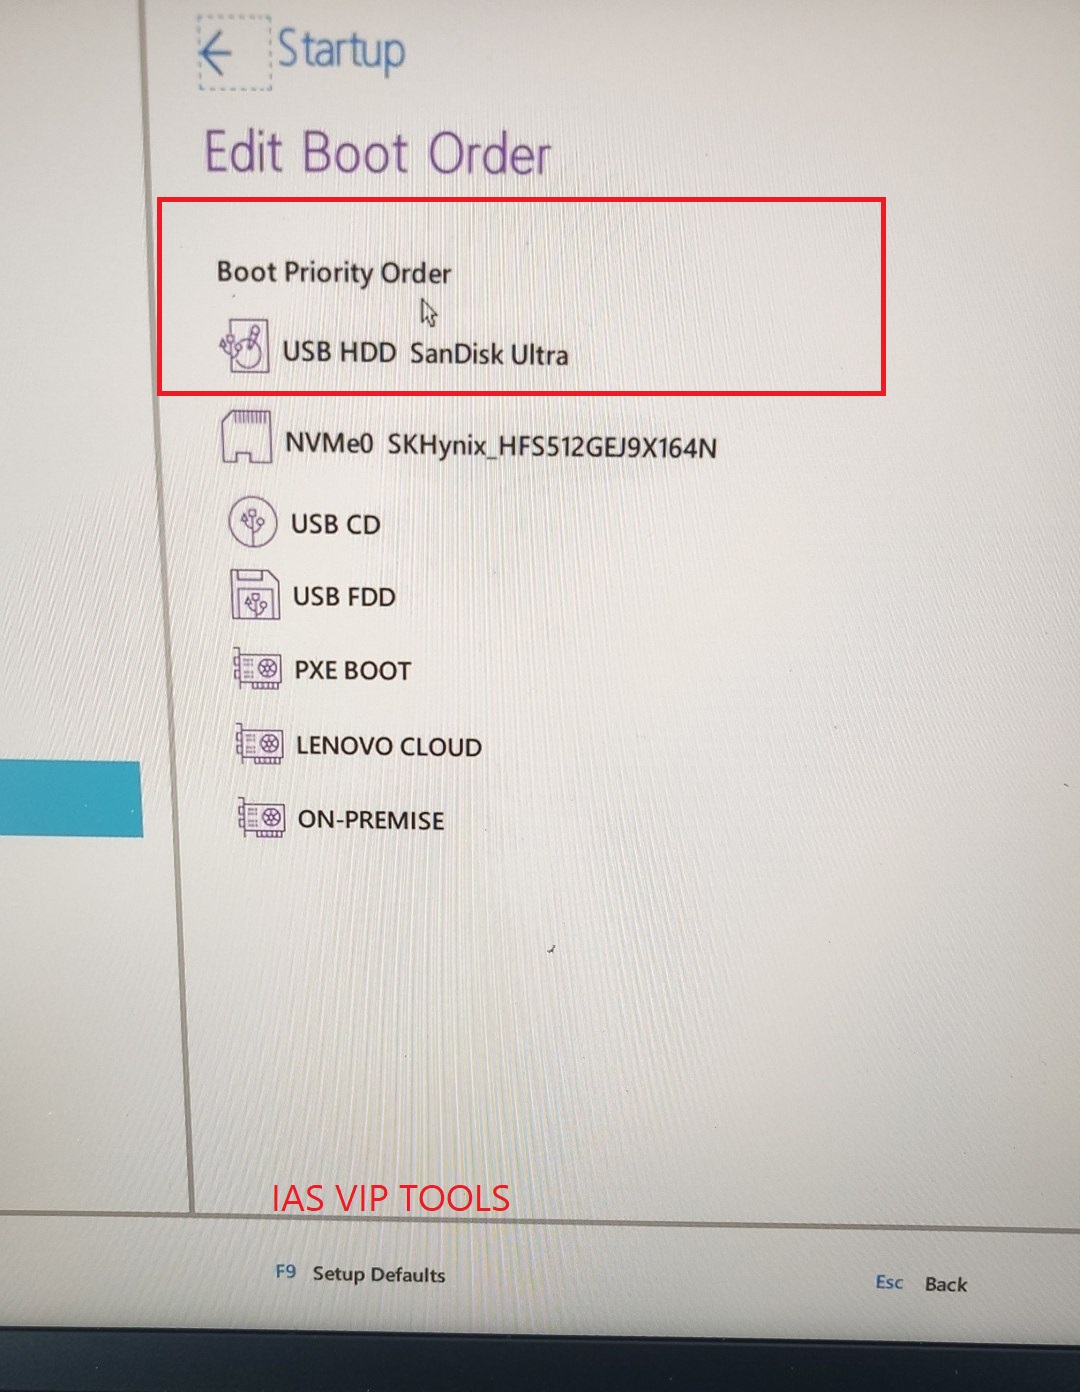
After: USB HDD (SanDisk Ultra) at Position 1 ✔ (CORRECT)
Press F10 (or the Save button) to Save & Exit; the laptop will reboot. F10 dabayein ya Save button click karke Save & Exit karein; laptop reboot hoga.
Second boot using F12 key to authorize Golden U1 environment. F12 key dabakar doosra code generate karein aur Golden U1 boot karein.
On this reboot, press F12 continuously — DO NOT PRESS F1 THIS TIME! Is reboot par lagatar F12 dabayein — is baar F1 KABHI NA DABAYEIN!
Pressing F12 triggers the secondary authentication phase.The QR code screen will appear again — repeat the action: scan the new QR or save the text file to USB. Screen par dobara naya QR code dikhega — wahi step karein: QR scan karein ya file USB me save karein.
Remove the USB drive, upload the new file to IAS VIP Tools, and generate the second 16-digit code. USB pen drive nikal kar file ko IAS VIP Tools me upload karein aur doosra 16-digit code generate karein.
Reconnect the USB pen drive to the exact same USB port again. USB pen drive ko dobara usi same USB port par connect karein.
Enter the generated 16-digit code, press OK, then press F12 to continue. Generated 16-digit code enter karein, OK dabayein aur F12 dabakar continue karein.
This time, the laptop will boot directly into the Golden Key U1 pen drive environment. Is baar laptop seedha Golden Key U1 pen drive environment me boot hoga.
Execute Option 4 in the ThinkPad Maintenance Utilities menu to clear password hash. ThinkPad Maintenance Utilities me Option 4 chala kar supervisor lock erase karein.
You will see the ThinkPad Maintenance Utilities menu. Select Option 4 — Initialize EEPROM (INIT FW) by pressing the 4 key. Screen par ThinkPad Maintenance Utilities menu dikhega. Option 4 — Initialize EEPROM ke liye 4 key dabayein.
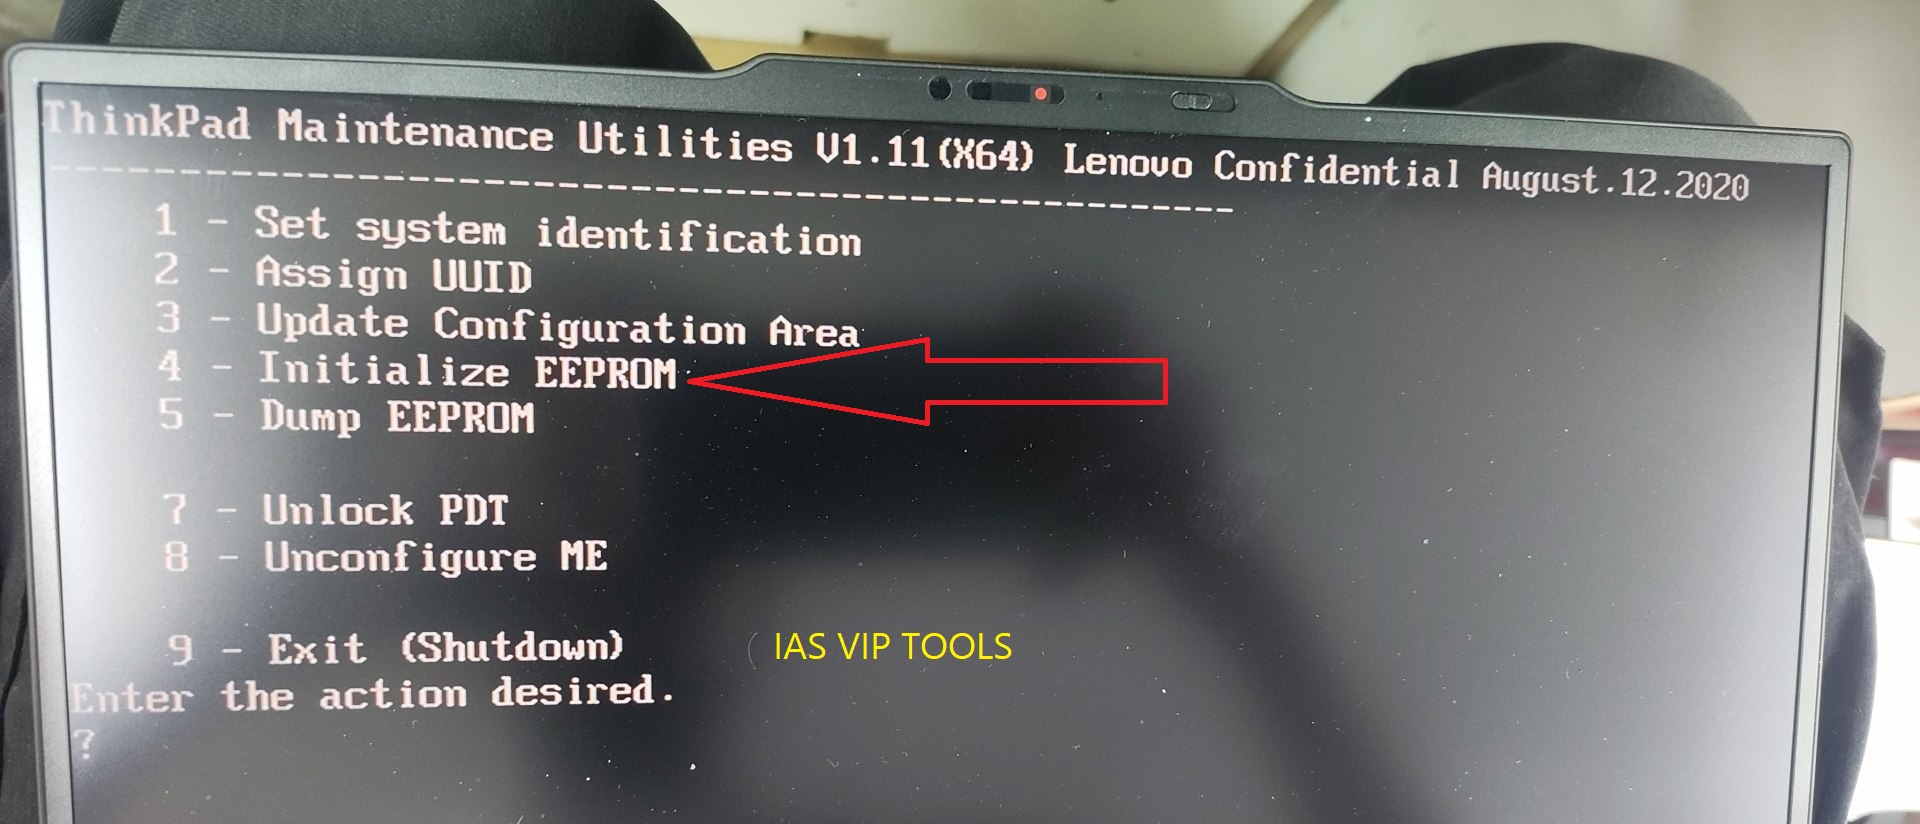
Reference: ThinkPad Maintenance Utilities → 4 - Initialize EEPROM.
When the prompt "Initialize EEPROM. OK? [Y/N]" appears, press the Y key on your keyboard. Jab screen par "Initialize EEPROM. OK? [Y/N]" ka confirmation prompt aaye, tab keyboard par Y dabayein.
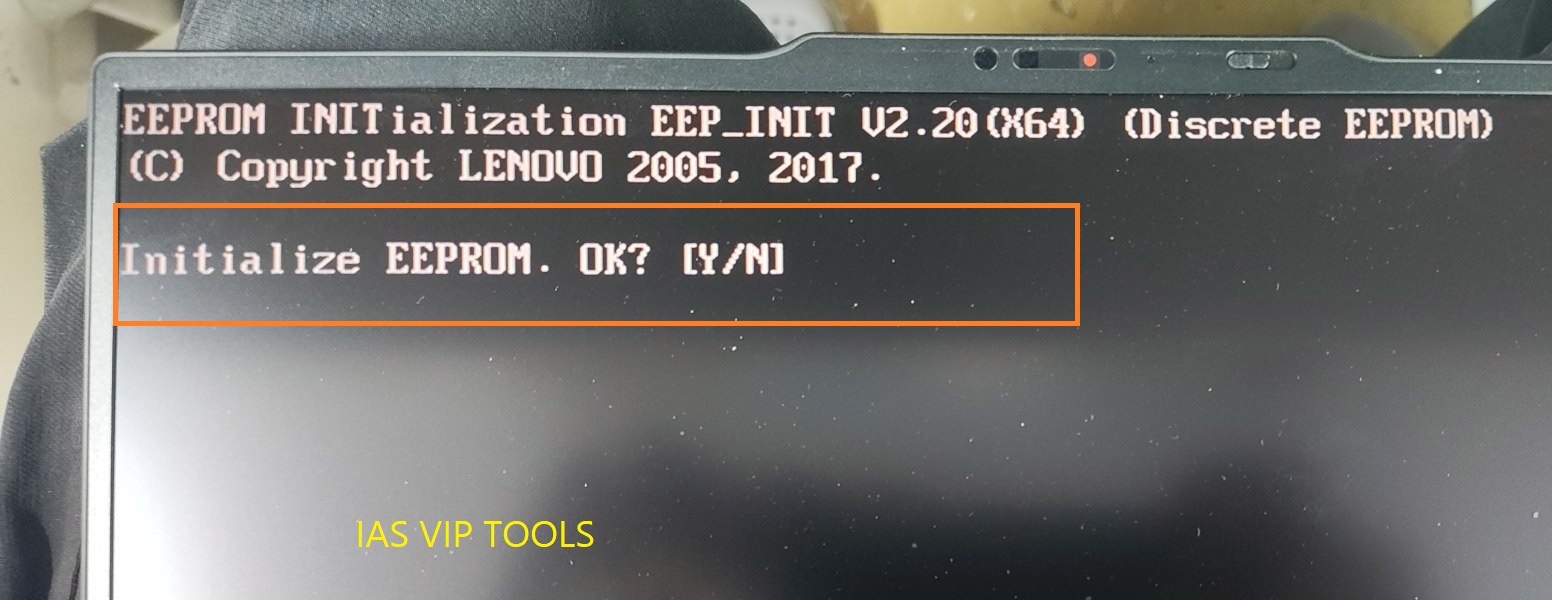
Reference: "Initialize EEPROM. OK? [Y/N]" — Press Y.
A "Succeed" confirmation message appears — press Enter to return to the menu. Screen par "Succeed" ka green message dikhega — menu me lautne ke liye Enter dabayein.
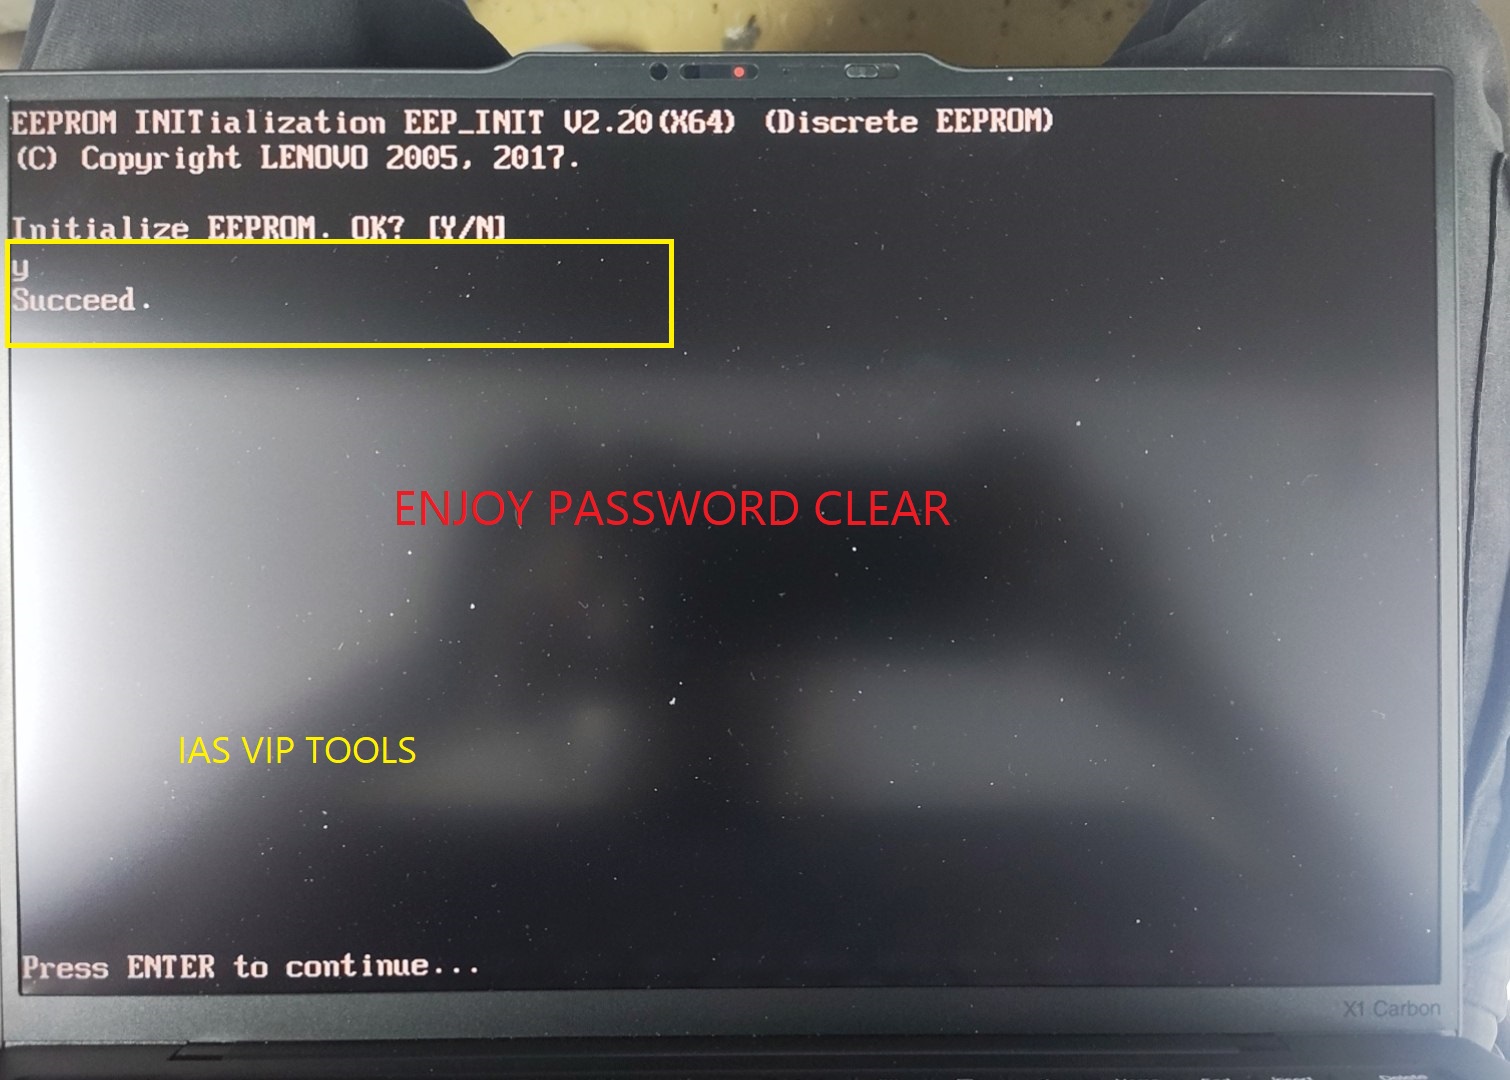
Reference: "Succeed. Press ENTER to continue…" ✔ (EEPROM RESET COMPLETE)
Shut down laptop, write back original clean dump, and verify full unlock. Laptop shutdown karein, original BIOS flash karein aur laptop permanently unlock ho gaya.
To exit the utility, choose Option 9 — Exit (Shutdown) by pressing the 9 key. Utility se exit karne ke liye Option 9 — Exit ke liye 9 key dabayein; system band ya restart hoga.
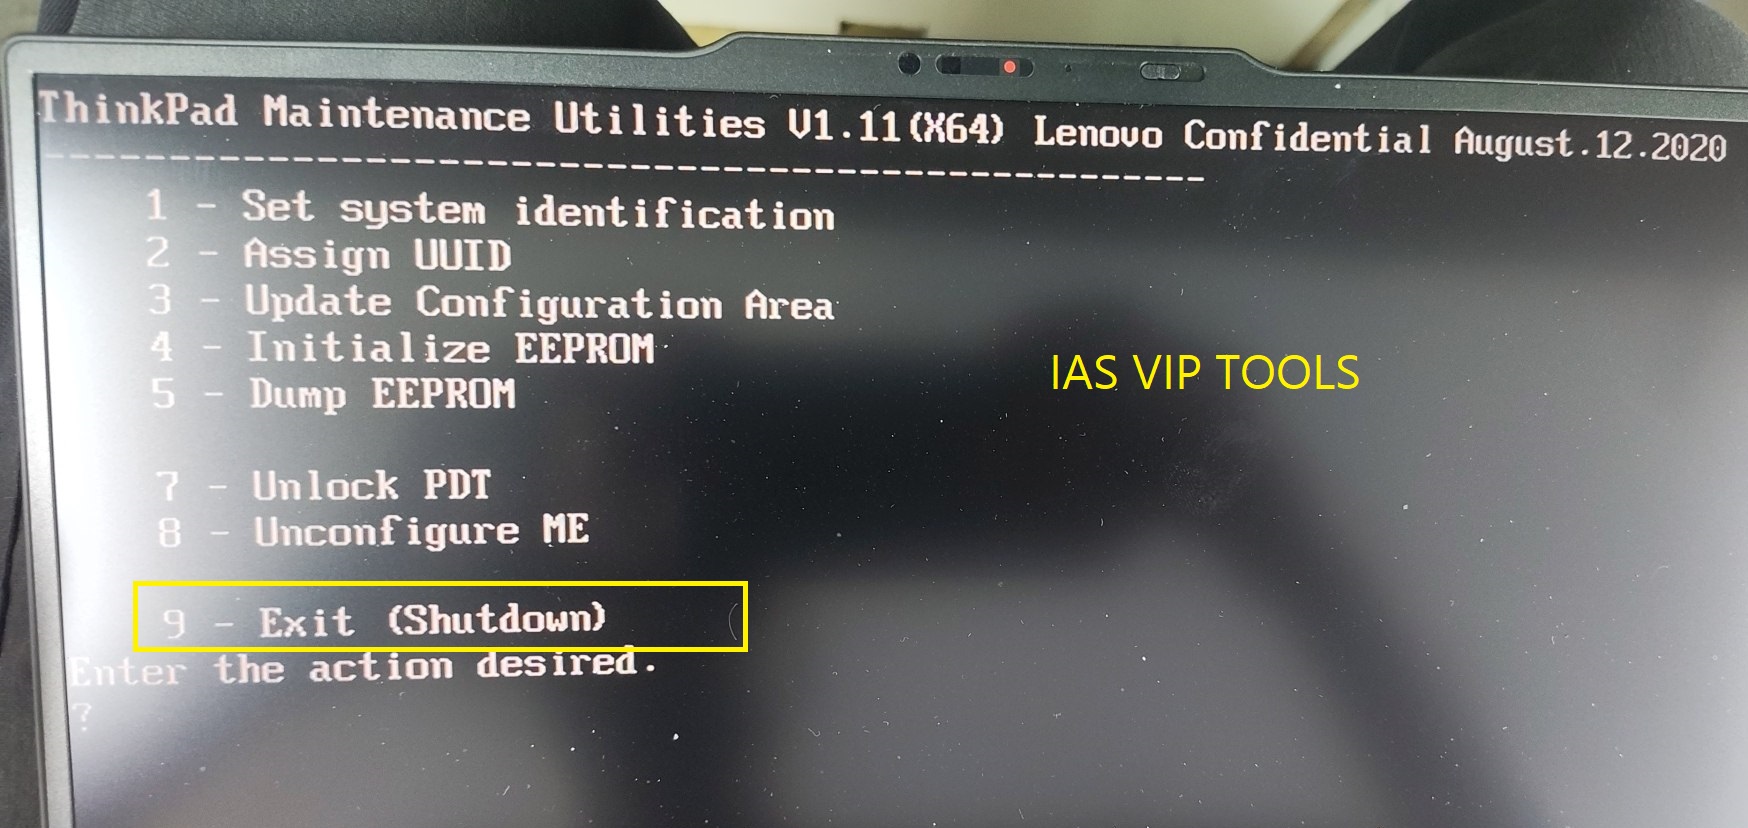
Reference: Option 9 - Exit (Shutdown).
Now turn off the laptop completely and disconnect the power adapter and battery. Ab laptop ko poori tarah band / turn off karein aur battery aur charger hata lein.
Finally, flash your ORIGINAL (locked) BIOS back onto the SPI chip — and your Lenovo ThinkPad is 100% UNLOCKED! 🎉 Aakhir me apna ORIGINAL (locked) BIOS wapas chip par flash karein — aur aapka Lenovo ThinkPad 100% UNLOCK ho gaya! 🎉
Because the EEPROM chip has been cleanly reinitialized by the Golden U1 tool, your original BIOS now boots straight into setup with no password prompt! Serial number, UUID, Windows DMI, and cryptographic keys remain 100% factory original! Kyunki EEPROM chip ko Golden U1 tool ne permanently initialize kar diya hai, ab aapka original BIOS bina kisi password prompt ke seedha khulega! Serial number, UUID aur Windows license bilkul factory original rahenge!
You have reached the final step. Your ThinkPad's supervisor password has been permanently wiped and original security keys restored. Aapne sabhi steps follow kar liye hain. Aapka ThinkPad bina kisi hardware damage ke permanently unlock ho chuka hai.